Monday, 14 July 2025
Week 14- Contrast Ratio (lighting pt.2)
Contrast Ratio
Contrast Ratio is a measurement of the difference in brightness between the whitest white and the darkest black within an image. A ratio of 300:1 means the brightest point in the image is 300 times as bright as the darkest point. A higher contrast ratio therefore means a larger difference in brightness.
Week 14- Film Noir Lighting in the shadows

Film Noir (literally 'black film
or cinema') was coined by French film critics (first by Nino Frank in 1946)
who noticed the trend of how 'dark', downbeat and black the looks and themes
were of many American crime and detective films released in France to theatres following
the war, such as  The Maltese Falcon (1941), Murder, My Sweet (1944), Double Indemnity (1944), The Woman in the Window (1944), and Laura (1944).

A wide range of films reflected the resultant tensions and insecurities of the time period, and counter-balanced the optimism of Hollywood's musicals and comedies. Fear, mistrust, bleakness, loss of innocence, despair and paranoia are readily evident in noir, reflecting the 'chilly' Cold War period when the threat of nuclear annihilation was ever-present. The criminal, violent, misogynistic, hard-boiled, or greedy perspectives of anti-heroes in film noir were a metaphoric symptom of society's evils, with a strong undercurrent of moral conflict, purposelessness and sense of injustice. There were rarely happy or optimistic endings in noirs.

The themes of noir, derived from sources in Europe, were imported to Hollywood by emigre film-makers. Noirs were rooted in German Expressionism of the 1920s and 1930s, such as in The Cabinet of Dr. Caligari (1920, Germ.) or Fritz Lang's M (1931, Germ.), Fury (1936) and You Only Live Once (1937).

Films from German directors, such as F. W. Murnau, G. W. Pabst, and Robert Wiene, were noted for their stark camera angles and movements, chiaroscuro lighting and shadowy, high-contrast images - all elements of later film noir. In addition, the French sound films of the 30s, such as director Julien Duvivier's Pepe Le Moko (1937), contributed to noir's development.
Friday, 4 July 2025
Week 9- C Stands
There are tons and tons of ways to use a C-stand, which make them a must-have piece of equipment when shooting a film.
But using them isn't as easy as it looks. Seriously -- if you're looking at a C-stand and thinking, "What's the big deal? Just loosen those knobby things, pull out those bars, and plop a light on it," then your chances of accidentally knocking a light over and busting your buddy in the head just went up 10,000%. In this great tutorial, the folks over at RocketJump Film School help us out with terminology, safety precautions, and even a few tricks to ensure that nothing falls down and goes boom.In case you couldn't watch the video, here are a few of the key C-stand tips RocketJump mentions:
- Keep the big leg under the weight, because it provides the most support.
- ALWAYS put a sandbag on the big leg, because the other legs are too short to keep the sandbag off of the floor (bag on floor = less support).
- Keep the knuckles on the right side, because if the arm ever becomes loose and starts to fall, it'll self-tighten.
Week 9-Finding light for your video

Finding Video Production Lighting
Light can either be natural or man-made. Today's video cameras are so sensitive to light that videographers can shoot in light that would have made the great directors of yesteryear weep, moonlight or candlelight are both viable options. Look at every object that produces light as a potential source for your video. Car headlights - Ridley Scott lit a climactic scene in his 1978 film Alien with a rotating police light, the flashing added to the tension as the set was first lit and then sent into darkness. Jonathan Demme chose equally unexpected but dramatic lighting in the final moments of his 1991 film Silence of the Lambs where Jodie Foster is chased through a completely unlit basement by a villain wearing night vision goggles.
Using the Sun for Video
All video production lighting is an imitation of the sun. The reason that Hollywood doesn't always like to use the sun is that it's not completely reliable. It moves, or rather the earth moves around it, so even 10 minutes into a shoot you can see changes on the shadows of your subjects unless you have them constantly moving in conjunction with the sun... not a viable option. Then there's cloud cover to consider, a completely overcast day is a dream to filmmakers, but doesn't happen too often.With artificial lighting you can achieve the same, constant, unchanging light regardless of the time of day or how overcast it might be. With artificial lighting you can make a scene brighter or dimmer by adding or subtracting lights or changing their position. But it wasn't always like this - Thomas Edison, who invented "moving pictures" as we know them built the first motion picture studio, The Black Maria which involved not only a roof that opened up to let the sun in, but the entire building was built on casters so that it could be rotated as the sun moved across the sky.

Using Window Light for Video
Some of the best light is the light you find coming through a window. Light coming inside from the outside is usually diffused a bit, and as long as your subject doesn't have its back to the window, thus throwing the whole image into a back-lit nightmare, you can use window lighting well.You simply have to seat your subject two or three feet back, depending on the size of the window, shoot a 3/4-angle from the side of the window, not directly into it - and this makes for excellent interview lighting.
Diffusers
Reflectors
The overhead sun is a harsh lighting source, creating deep, sharp shadows in the eyes. Some of this can be eliminated by the use of a simple reflector. The hardness or softness of a shadow is determined by the size of the source of illumination and its distance from the subject. The sun - look at it up there. Although it's really big, it's extremely far away, so it looks like it's about an inch across. This gives very harsh shadows. Collapsible reflectors are great for controlling this light, and some models come with a gold "warm" and silver "cool" side, often accompanied by a white diffuser. Or you can simply use a large piece of white foamcore or a rigid insulation sheet as a reflector (as the photo above illustrates. The silver is bright, so be cautious). Holding the sheet two or three feet away to bounce sunlight onto their faces creates a secondary source which, in relation, is huge. This even, reflected light will fill in those shadows and create a softer, more pleasing light.Practicals


"Practicals" are the movie and video producing term for existing lights. That lamp on your desk or the light in the hallway, they're "practical" lights. One of the things a lighting director needs to do is balance the existing light with the extra movie lights to keep the scene looking as natural as possible as well as balancing all the different colors, which is done either by replacing the bulbs or by gelling some of the lights. In the absence of additional lighting, one thing you can do is use only practicals. This is a technique used extensively by Stanley Kubrik in both his 1999 film Eyes Wide Shut as well as his 1975 masterpiece Barry Lyndon which featured scenes lit only by candlelight.
Don't automatically trust existing lighting. Most people don't understand lighting and as a result, lights in the home are often not designed in a way to make things pleasing but rather to make them illuminated. That overhead light in the living room will probably want some diffusion and other lights or reflectors on the side to keep everybody from looking like zombies. Use the light you find, but keep your aesthetics in mind while you're doing it. And also, don't assume that because you have a light that you need to use that light. Maybe the solution is to turn off the practicals and open the blinds.
DIY
There are also lots of inexpensive Do It Yourself lighting options rather than spending money on dedicated hot-lights, you can take a trip to the hardware store and make your own lighting out of things like quartz work lamps or banks of 3200k fluorescents.Conclusion
Unless you're in a cave, there's light around, somewhere. Finding that light, shaping it, and using it to your best advantage is one of the jobs of a video producer. Be aware of light constantly, always be thinking of it in terms of how it would work for video. Do you see mix-matched color temperatures? Do you see a way that harsh shadows can be made softer? Does the hard shadow of an overhead bare bulb give you ideas for a scene? Think with a critical eye every day and you won't be stymied on the set the next time your find out your lighting kit is on its way to Ipanema.Week 9 -Ambient Light
Ambient Light
Ambient light means the light that is already present in a scene, before any additional lighting is added. It usually refers to natural light, either outdoors or coming through windows etc. It can also mean artificial lights such as normal room lights.
Ambient light can be the photographer's friend and/or enemy. Clearly ambient light is important in photography and video work, as most shots rely largely or wholly on ambient lighting.

Unfortunately ambient light can be a real nuisance if it conflicts with what the photographer wants to achieve. For example, ambient light may be the wrong color temperature, intensity or direction for the desired effect. In this case the photographer may choose to block out the ambient light completely and replace it with artificial light. Of course this isn't always practical and sometime compromises must be made.

On the other hand, many of history's greatest photographs and film shots have relied on interesting ambient light. Unusual lighting can turn an otherwise ordinary shot into something very powerful.
Week 9 -Planning lighting in the scene


You will notice how the use of shading and varying brightness throughout the painting actually serves to give it more dimension and life-like qualities (fancy term for this: chiaroscuro). If an artist can achieve this with a paintbrush, we can also do so with our lighting techniques. Don’t believe me? Look below.


- 1:1 ratio – produces soft, even lighting when the key and fill lights are exactly the same.
- 2:1 ratio – The key light is twice as bright as the fill light, 1 stop difference.
- 4:1 ratio – more contrast result. There is a 2 stops difference between the key and fill lights.
- 8:1 ratio – very contrast lighting. It is a 3 stop difference between the key and fill lights.


It is a lighting scheme in which the fill light is raised to almost the same level as the key light – it is overall a ‘bright image’ with few dominant shadows. High Key Lighting is more even and flat than Low Key Lighting. Lighting techniques can vary within a movie – it all depends on what the story calls for.


1. the distance of the light source to the subject. The closer the source, the softer the light.
Week 9 -The Standard 3-Point Lighting Technique
The Three Point Lighting Technique is a standard method used in visual media such as video, film, still photography and computer-generated imagery. It is a simple but versatile system which forms the basis of most lighting. Once you understand three point lighting you are well on the way to understanding all lighting. The technique uses three lights called the key light, fill light and back light. Naturally you will need three lights to utilise the technique fully, but the principles are still important even if you only use one or two lights. As a rule:
- If you only have one light, it becomes the key.
- If you have 2 lights, one is the key and the other is either the fill or the backlight.
Key Light
This is the main light. It is usually the strongest and has the most influence on the look of the scene. It is placed to one side of the camera/subject so that this side is well lit and the other side has some shadow.
Fill Light
This is the secondary light and is placed on the opposite side of the key light. It is used to fill the shadows created by the key. The fill will usually be softer and less bright than the key. To acheive this, you could move the light further away or use some spun. You might also want to set the fill light to more of a flood than the key.
Back Light
The back light is placed behind the subject and lights it from the rear. Rather than providing direct lighting (like the key and fill), its purpose is to provide definition and subtle highlights around the subject's outlines. This helps separate the subject from the background and provide a three-dimensional look.
Week 9-How to choose the correct light for production
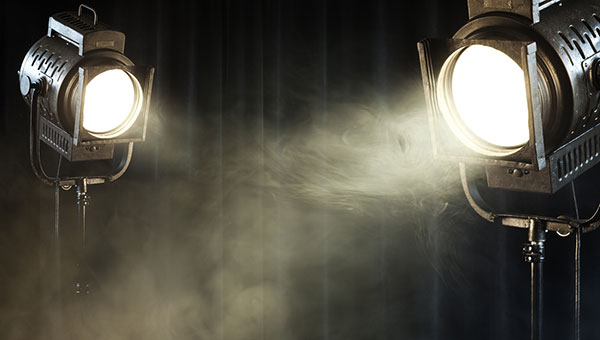
Tungsten

Tungsten
lights have been a video and film lighting mainstay for many years. A
tungsten filament, combined with halogen gas and enclosed within a
quartz envelope, produces a constant output and color temperature
throughout its life. They are affordable and produce large volumes of
very bright, high-contrast light, producing sharp, crisp shadows. Fortunately, light modifiers are available to control and soften tungsten’s brilliant beams as needed.

HMI
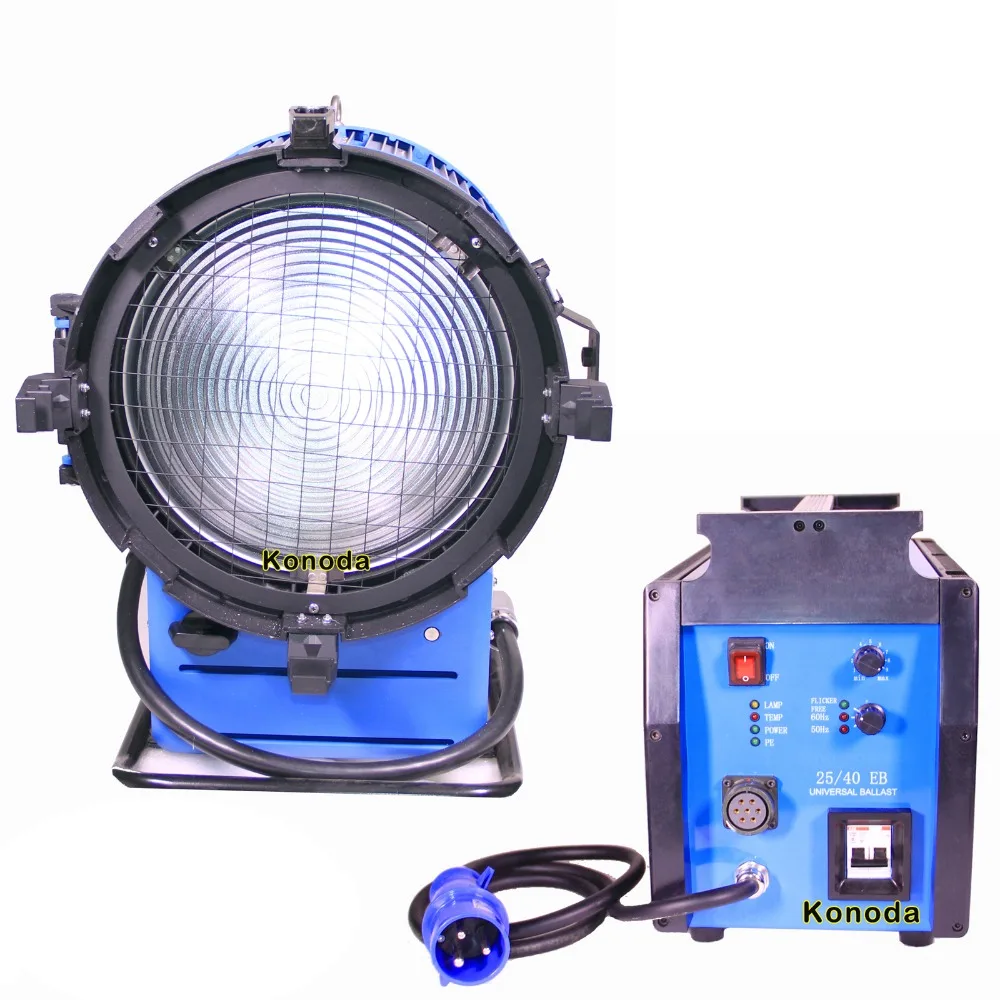
Another lighting option that is very
popular with professional video producers is the Hydrargyrum Medium-arc
Iodide lamp, or HMI. Unlike traditional lights, HMIs are daylight
balanced and produce a great deal more light than tungsten halogen
lights of the same wattage. For example, a 600W HMI produces as much
light output as a conventional 2000W unit with daylight filter and a
2500W HMI is equivalent to the output of 10,000W of traditional
tungsten. Requiring less power, they run much cooler, and like their
tungsten brethren, they can be modified to contain and direct all that
awesome brightness.
HMIs are considerably more expensive to buy
and maintain than conventional lights and each requires its own bulky
ballast to crank the voltage up into the necessary range. Once switched
on, they cannot be used immediately, as they require a bit of warm-up
time before reaching the correct color temperature.
Fluorescent

Fluorescents put out considerably less light than either tungsten or HMI lamps. Bank lights are available with multiple tubes and greater output but are larger, heavier and too bulky for easy travel. Newer designs, however, seek to resolve some of these issues. CFLs (compact fluorescent lamps) are daylight balanced and similar in size to common household light bulbs with the same screw-in base.
 LED
LED


LEDs are daylight balanced, consume low amounts of energy and are very cool to the touch. The diodes have extremely long life spans, rated in the tens of thousands of hours. On the one hand, they can be very compact, perfect for on-camera use or hard to light locations, such as lighting car interiors. On the other hand, they can be bundled together into large multi-panels for a cumulative effect. The intensity of LEDs can be varied, without altering the color temperature, while the color temperature itself can be independently changed between 3200K and 5600K.
The primary disadvantage of LEDs are their cost. And while their output is less than either tungsten or HMIs they may well offer the best of each world. They have the compact size and light weight of tungsten; the low power requirements, cool operating temperatures and longer life of fluorescents; lower cost than HMIs and, on some models, variable intensity and color temperature.
General Knowledge
Lighting Controls
Light modifiers have been mentioned throughout this article. Here are a few of them and their uses:
Barndoors - These attach to the front of the light fixture with two to four adjustable flaps for blocking the light from striking unwanted areas.
Flags - Non-reflective panels placed between light and subject to further prevent light from hitting unintended areas.
Reflectors - Highly reflective, light-bouncing panels for directing sunlight or lamplight, oftentimes to fill dark areas.
Umbrella - Similar to a traditional umbrella, these are attached to the light fixture to diffuse, or soften, the light output.
Softbox - A lightweight, collapsible housing, that fully encloses the light fixture. A diffuser panel at the front smooths and widens the light source.
Gels - Affixed in front of the light fixture (often with a frame) for color correction in mixed light situations, to diffuse or reduce light output or simply add a bit of color to the scene.
Gobos/Cookies - Any number of objects placed in front of the light source to cast shadows onto the scene or textures onto a plain backdrop.
Week 9 -Lighting Terminology
| Ambient Light | The light already present in a scene, before any additional lighting is added. | ||||
| Incident Light | Light seen directly from a light source (lamp, sun, etc). | ||||
| Reflected Light | Light seen after having bounced off a surface. | ||||
| Colour Temperature | A standard of measuring the characteristics of light, measured in kelvins. | ||||
| Contrast Ratio | The difference in brightness between the brightest white and the darkest black within an image. | ||||
| Key Light | The main light on the subject, providing most of the illumination and contrast. | ||||
| Fill Light | A light placed to the side of the subject to fill out shadows and balance the key light. | ||||
| Back Light | A light placed at the rear of a subject to light from behind. | ||||
| Hard Light |
Light directly from a source such as the sun, traveling undisturbed onto the subject being lit. | ||||
| Soft Light | Light which appears to "wrap around" the subject to some degree. Produces less shadows or softer shadows. | ||||
| Spot | A controlled, narrowly-focused beam of light. | ||||
| Flood | A broad beam of light, less directional and intense than a spot. | ||||
| Tungsten | Light from an ordinary light bulb containing a thin coiled tungsten wire that becomes incandescent (emits light) when an electric current is passed along it. Tungsten colour temperature is around 2800K to 3400K. Also known as incandescent light. | ||||
| Halogen | Type of lamp in which a tungsten filament is sealed in a clear capsule filled with a halogen gas. | ||||
| Fresnel | A light which has a lens with raised circular ridges on its outer surface. The fresnel lens is used to focus the light beam. | ||||
| Incandescent | Incandescent lamps produce heat by heating a wire filament until it
glows. The glow is caused by the filament's resistance to the current
and is called incandescence. |
Week 9 -Lighting with Background Windows


Video is particularly susceptible to this problem due to it's relatively low contrast ratio. If you can't avoid having the window in shot, in most cases the only thing you can do is use the manual iris to set your exposure correctly for the subjects in the room. This means that the window will be over-exposed but that's a necessary compromise.
If you wish to show the outside view, expose the iris for the window (which will make the room dark). If you have time and resources available, there are two things you can do to help even out the lighting so it's possible to capture both areas effectively: 1) Add more light to the room 2) Reduce the light from the window
(1) Increase the Lighting in the Room
Any extra light you can shine on the subject will decrease the contrast ratio between them and the window.In some cases switching on the standard room lighting can help, although this often introduces new problems such as clashing colour temperatures and harsh downward shadows.
It's possible that a reflector board could be useful.

2) Reduce the Light from the Window
You can reduce the amount of light coming through the window by placing some sort of filter over it.In the example pictured here, black scrim (a fine mesh material) is taped to the window. You can see that the background is much more manageable through the scrim.
If the entire window needs to be in shot you'll need to be careful and discreet with the scrim/filter. It can be difficult getting exactly the right fit. If only part of the window is in shot it's a lot easier.
Filters can cause unwanted side effects such as ripple and the moire effect. Being further away from the window helps.
